Showing posts with label holidays. Show all posts

12.10.2010

Goo-goo Gaga Shrimp Cocktail

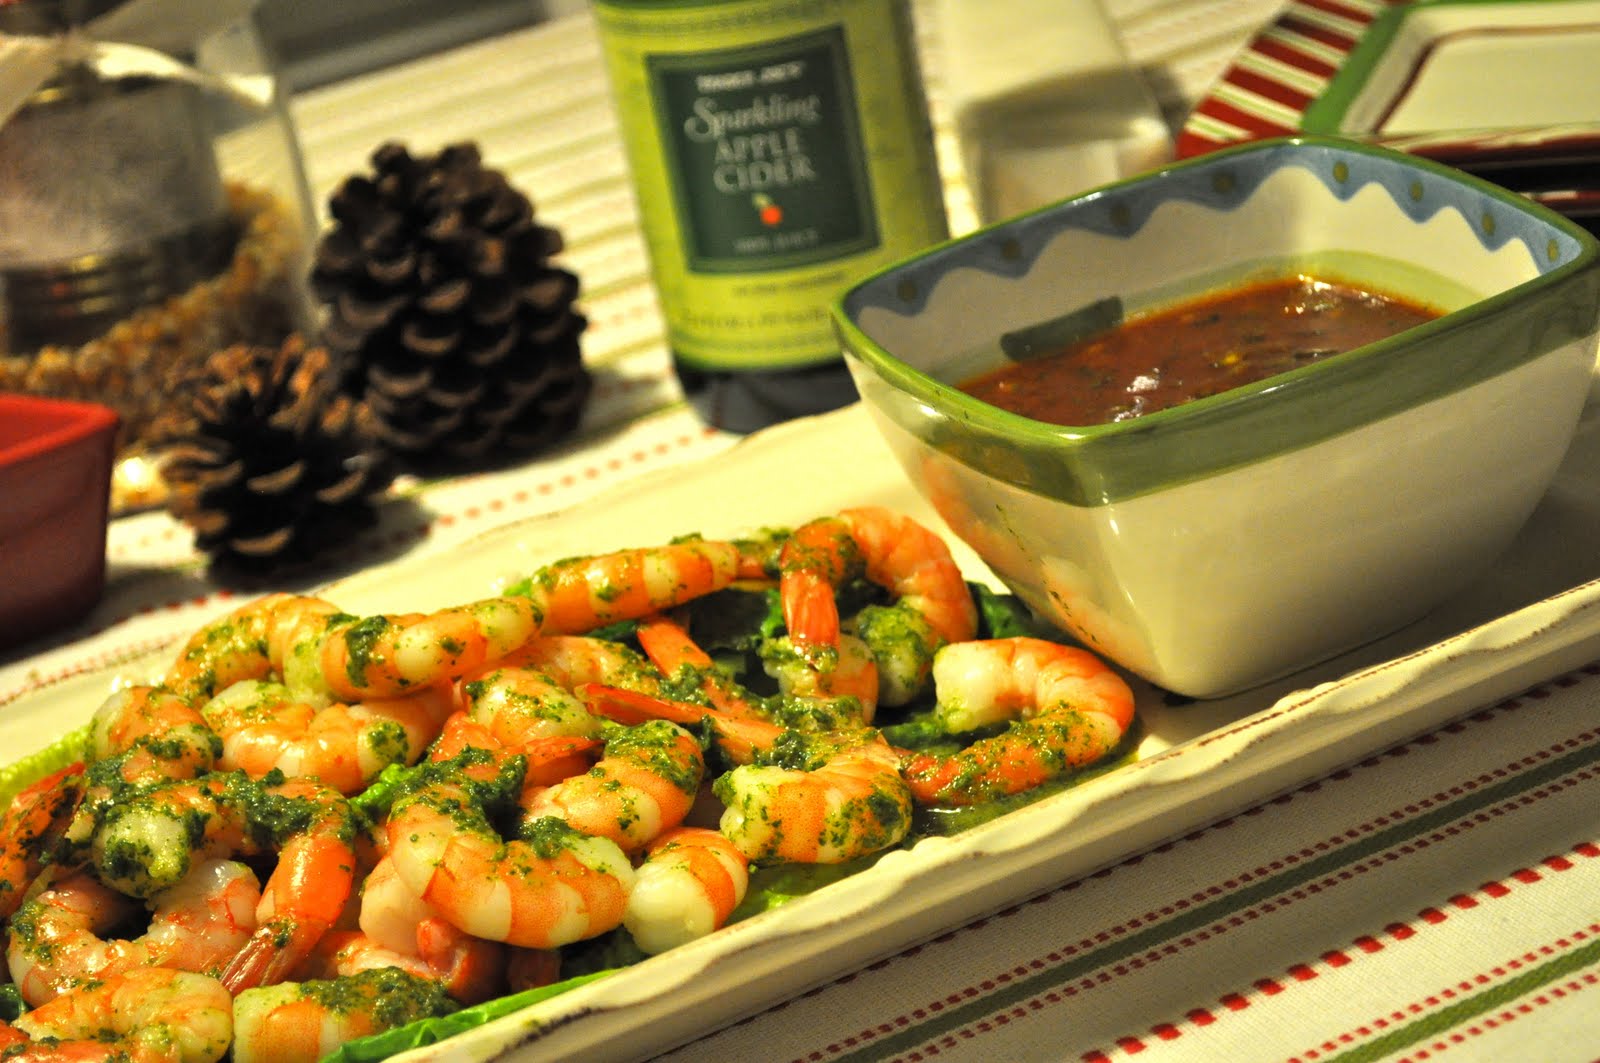
So Shugga and I hosted a lil' "Kick Off to Christmas" night with a couple of our friendlies last weekend (get it? 1st wkend in december). Cute, huh? So sorry the pic of the Shweeet Shrimp isn't the grandest! But not to be fooled my fluffy foodies - this app is your "go to" this holiday season! The guests will be guessing what's in the keep dippin' n' lickin' your fingers in (it's that good) of a dip. Plain Jane cocktail sauce in a jar is sooo great grandma ago! Be still my heart.... Nummmmers!

Da Dip Ingredients/Directions
1/2 cup ketchup
1/3 cup honey
2 T cumin
1/4 cup finely diced fresh cilantro
1 finely diced (seeds removed) jalapeno
1/2 cup freshly squeezed lime juice
*combine all ingredients and stir. plate shrimp on a bed of lettuce leaves and drizzle with sauce (see below). serve at room temperature.

Shrimp drizzle Ingredients/Directions
1/4 cup lime juice, 2 T olive oil, 1/2 cup cilantro, 1 small jalapeno, pinch of salt: mix in a food processor or blender until completely smooth. Drizzle lightly over shrimp before serving.

Psst! This recipe came courteous of a professional chef who catered a company dinner party we got invited to. Yeah, he was way nice for splurging his secret!

12.05.2010

Merry Marshmallows

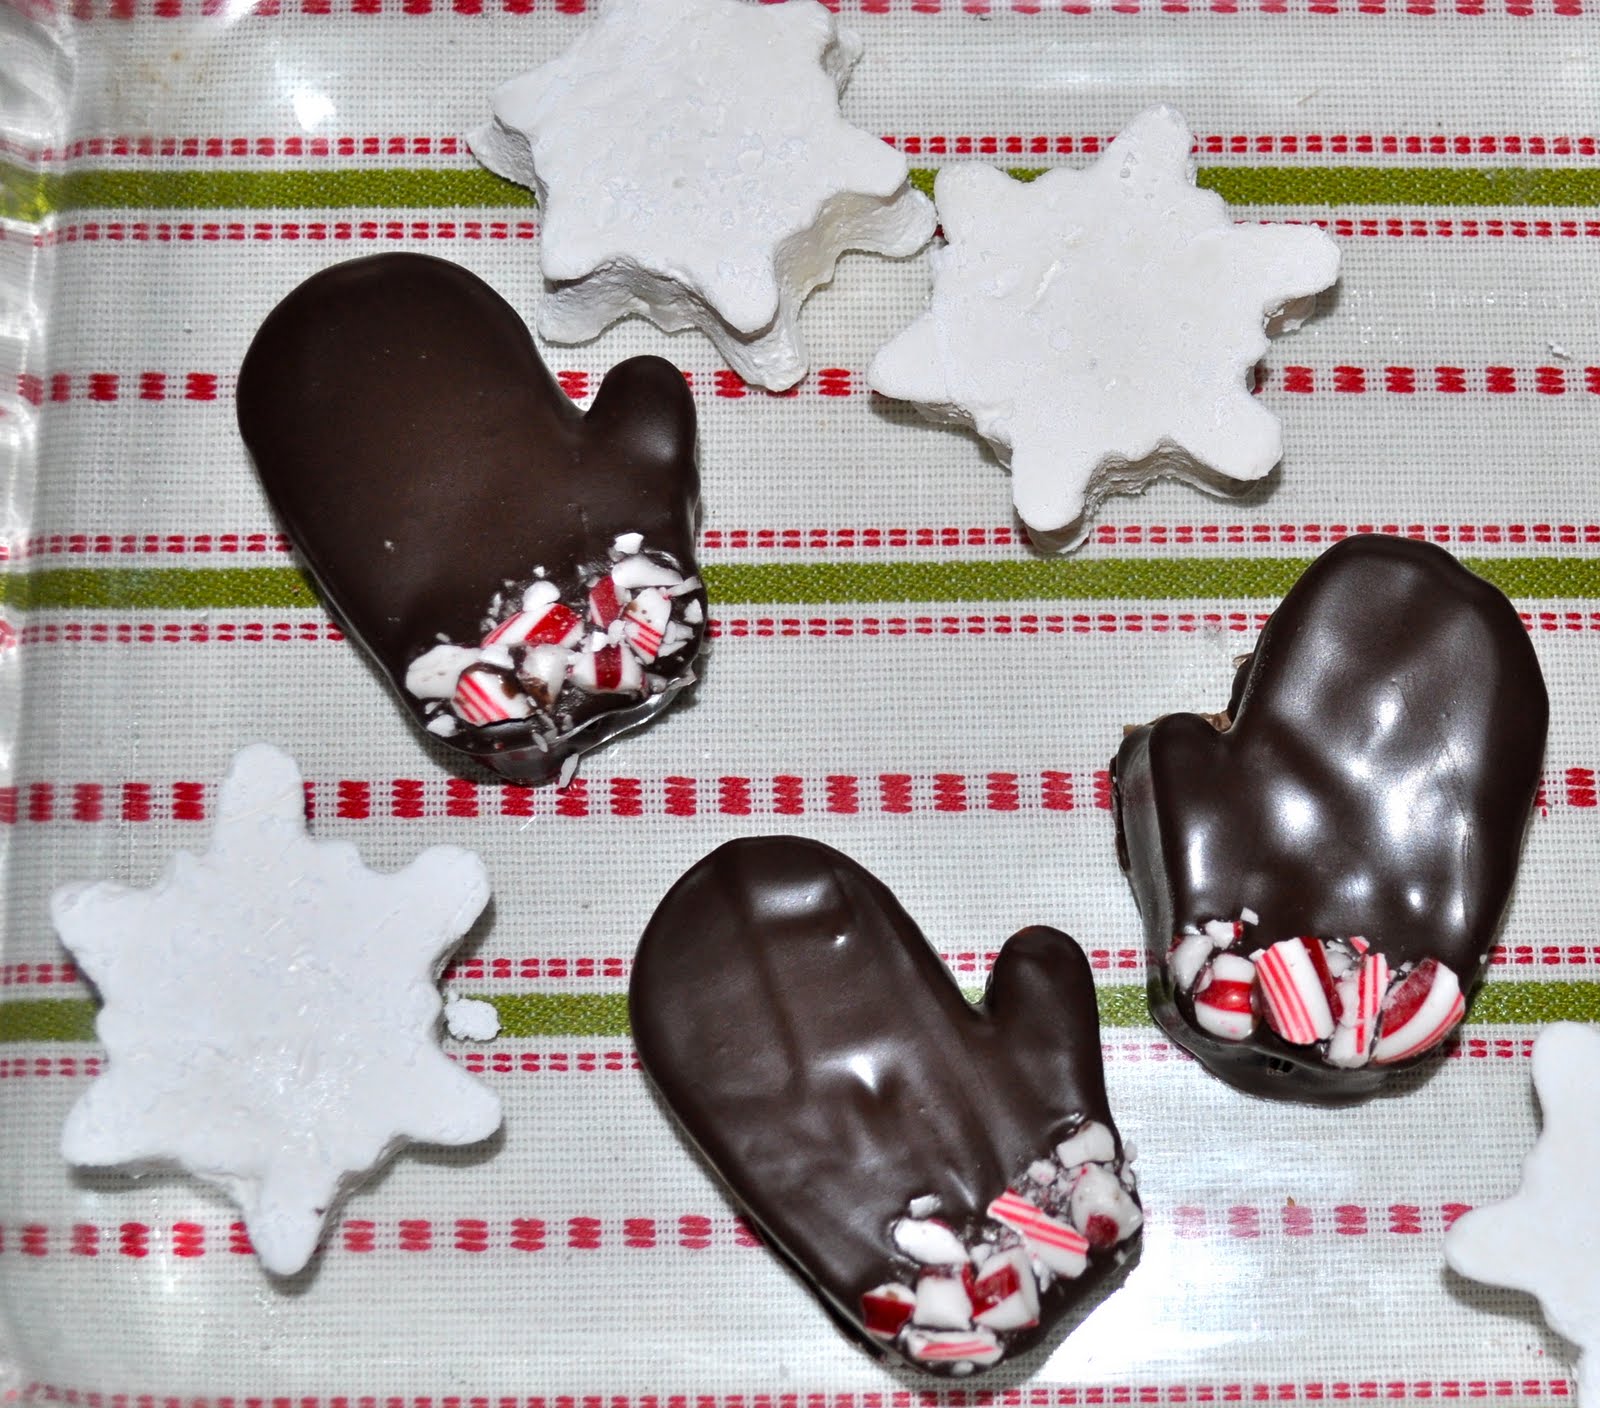
'tis the season to be roasty toasty and happy go merry! seriously, these homemade marshmallows bring instant smiles! soooo fun to make - yes it will be messy and crazy (you may feel the need to hold your tongue from cursing) - but the end result is well worth it. i've never been a fan of marshmallow - just weird to me for some reason. but homemade? totally HUGE difference. i couldn't taste the chocolate covered mittens, but sugarbuns said it was heaven in a mug. the chocolate melts first before melting the ooey-gooey goodness of the 'mallow. Word to the wise: wear an apron - i goobered my new hoodie... ticked.
Ingredients:
Nonstick cooking spray (PAM)
3 packets of Knox unflavored gelatin
1/2 cup cold water
2 cups sugar
2/3 cup light corn syrup
1/4 teaspoon kosher/sea salt
1 1/2 teaspoon vanilla extract
ghiradelli baking chocolate (sam's carries big blocks)
crushed peppermint candy canes (I prefer Bob's)
powdered sugar for dusting snowflakes

Directions:
Lightly spray a 9X13 glass baking dish with cooking spray. Line the entire pan with plastic wrap. Spray the wrap with cooking spray and set aside.

In the bowl of an electric mixer (don't use a hand mixer - you'll burn out the motor) fitted with the whisk attachment, pour 1/2 cup cold water into the bowl. Pour the gelatin packets into the cold water and let stand for ~10 minutes.

In the meantime, combine sugar, 1/4 cup water, and corn syrup in a medium saucepan. Turn heat to med-high and bring to a boil. Boil rapidly for 1 minute - stirring constantly (temp should be ~245 on a candy thermometer). If you don't have a therm don't fret - just boil for at least 1 minute. Pour hot sugar SLOWLY into the bowl of gelatin with the mixer on medium speed. Add salt and turn mixer up to high. Whisk on high for 12 minutes.

Turn mixer to low and add the vanilla and mix until combined. Spray a rubber spatula LIBERALLY and pour the marshmallow into the prepared baking dish. You won't be able to get every drop out - just get the majority out. Don't worry about spreading the marshmallow smooth with the spatula (it ain't happin' sista... so don't stress). Instead spray your hands and pat the marshmallow pushing to the sides and corners until evenly distributed. Spray another sheet of plastic wrap and place, spray side down, directly on top the marshmallow. Let sit over night.

Remove the plastic wrap and remove marshmallows from dish. Place the marshmallows on wax or parchment paper. Spray cookie cutters (mitten, snowflake) liberally with cooking spray and press firmly into the marshmallow. Remove and place into a container lined with wax or parchment paper. Repeat until all marshmallows are cut. If leaving white, roll marshmallows in powdered sugar to keep from sticking. If dipping in chocolate don't roll in sugar. Dip when chocolate is slightly cooled and decorate with candy pieces. Marshmallows will stay good for 3 days in an airtight container. *Makes about 16

10.12.2010

Caramel-Honey Apples

Have you ever made caramel apples using honey? Yeah, me neither. Found this cool recipe but tweeked it to my liking. Supposedly these are seriously num-yum for the tum-tum {that is, if you're a honey fan}. Who knows...but they look gorge. C'mon now - at the end of the day it's all about looks anyways, right? So dress to impress either simple-sheek or fru fru fancy with toppings. I gave loverbuns some options to choose from so that he could do the official taste test slash stamp of approval. They got his stamp...
Word to the amateurs: if you're planning on being totally selfless and saving any defected ones for gifts - spray the cellophane bag with cooking spray beforehand so Mr. Apple Dandy will come out without a fight. Or yet again it could be funny to watch and record from a bedroom window the neighbor's attempts of getting it out w/o spray. Your call. But remember to CTWrong ...er I mean CTR (choose the right).

Ingredients:
3 medium sized honeycrisp apples
1/2 cup whipping cream
1/2 cup honey
1/4 t. salt
1 T butter
1/2 t. vanilla
optional: toppings {chopped peanuts with drizzled chocolate, health bar toffee pieces)

Directions:
Combine whipping cream, honey, salt, and butter into a medium-sized sauce pan. Bring to a roaring boil. Turn heat down to medium. Stir occasionally. Insert a candy thermometer to gauge the temp until it reaches 150-160 degrees (~15 min). In the meantime wash and dry the apples. Place them on a cookie sheet lined with wax paper. Insert popsicle sticks into the center and place in the fridge while the caramel continues to cook. Once the thermometer reaches 150-160, remove the pan from heat and scrape down the sides. Add the vanilla and stir with a spatula. Let cool for 5-10 minutes or until the caramel begins to thicken. Once semi-thickened roll the cold apples several times around to add a thick coat of caramel. Place back onto the lined cookie sheet and refridgerate for 20 minutes. At this point you can either eat the apples plain or add your toppings of choice. Once the toppings are added, return the apples back to the fridge until ready to serve.

7.04.2009

July 4 Daily D: Firework Icie Cubes!

Want a big BAaang to add to any clear colored Bev today!!?? This is super cutie-ba-tootie and sooo simple! All you have to do is buy some of those "old school" icie-cube trays [or if you already have 'em...ask your husby to buy you a fridge with an ice-maker ma-bobber bc you deserve it]!

Umm...kay.

Ingredients

Mountain Berry Blast Powerade
Hawaiian Sun Fruit Punch
San Pellegrino, Sprite, lemonade, or any clear beverage
ice cube trays or molds

Directions

You have the icie-cube molds slash trays and just fill 'em with a blue liquid of choice - I used Mountain Berry Blast Powerade [preferably not window-washy fluid...this is toxic and can harm your poopsies]. Then fill another tray with red liquid of choice - I used Hawaiian Sun Tropical Punch! Frrrreeeze 'em and then pop 'em into some San Pellegrino, Sprite, Lemonade or any clear Bev for a ROcKiN Boom Boom POW Fireworks in a glass!

7.03.2009

July 4 Daily D: Patriotic Milkshakes!

Ingredients
Serves 12

6 ounces (1 3/4 cups) raspberries, plus more for garnish
4 ounces strawberries, stemmed and quartered (1 cup), plus more for garnish
5 ounces (1 cup) pitted whole cherries, plus more for garnish
3 1/2 teaspoons fresh lemon juice
1/2 cup sugar
16 ounces (4 cups) blueberries, plus more for garnish
2 quarts vanilla ice cream, softened
1/2 cup whole milk
1 teaspoon pure vanilla extract

Directions

Combine raspberries, strawberries, cherries, 1 1/2 teaspoons lemon juice, and 1/4 cup sugar in a small saucepan. Cook over medium heat, stirring frequently, until berries release their juices, about 10 minutes. Transfer to a bowl, and refrigerate until cold.

Combine remaining 2 teaspoons lemon juice and 1/4 cup sugar with 2 cups blueberries in a small saucepan. Cook over medium heat, stirring occasionally, until berries release their juices, about 10 minutes. Transfer to a bowl. Let cool completely. Stir in remaining 2 cups blueberries, cover, and refrigerate until cold.

Whisk ice cream, milk, and vanilla in a large bowl. Spoon 1/4 cup of either fruit mixture into the bottom of a glass. Top with milk shake. Repeat with remaining fruit and milk shake. Garnish milk shakes with fresh fruit, and serve immediately.


[pic and recipe from marthastewart.com]

7.02.2009

July 4 Daily D: Flag Cake!


Ingredients

18 tablespoons (2 1/4 sticks) unsalted butter at room temperature
3 cups sugar
6 extra-large eggs at room temperature
1 cup sour cream at room temperature
1 1/2 teaspoons pure vanilla extract
3 cups flour
1/3 cup cornstarch
1 teaspoon kosher salt
1 teaspoon baking soda

For the icing:
1 pound (4 sticks) unsalted butter at room temperature
1 1/2 pounds cream cheese at room temperature
1 pound confectioners' sugar, sifted
1 1/2 teaspoons pure vanilla extract

To assemble:
2 half-pints blueberries
3 half-pints raspberries

Directions

Heat the oven to 350 degrees F. Butter and flour an 18 by 13 by 1 1/2-inch sheet pan.

Cream the butter and sugar in the bowl of an electric mixer fitted with the paddle attachment on high speed, until light and fluffy. On medium speed, add the eggs, 2 at a time, then add the sour cream and vanilla. Scrape down the sides and stir until smooth.

Sift together the flour, cornstarch, salt, and baking soda in a bowl. With the mixer on low speed, add the flour mixture to the butter mixture until just combined. Pour into the prepared pan. Smooth the top with a spatula. Bake in the center of the oven for 20 to 30 minutes, until a toothpick comes out clean. Cool to room temperature.

For the icing, combine the butter, cream cheese, sugar, and vanilla in the bowl of an electric mixer fitted with the paddle attachment, mixing just until smooth.

Spread three-fourths of the icing on the top of the cooled sheet cake. Outline the flag on the top of the cake with a toothpick. Fill the upper left corner with blueberries. Place 2 rows of raspberries across the top of the cake like a red stripe. Put the remaining icing in a pastry bag fitted with a star tip and pipe two rows of white stripes below the raspberries. Alternate rows of raspberries and icing until the flag is completed. Pipe stars on top of the blueberries.

I serve this cake right in the pan. If you want to turn it out onto a board before frosting, use parchment paper when you grease and flour the pan.

Variations: I have seen this same cake done without the frosting stars. It's just as cute and doesn't require a pastry bag!


[recipe and pic from food network-ina garten]

7.01.2009

July 4 Daily D: Cute Cupcakes!

Ingredients
Makes 34

For the Cupcakes:
3 1/4 cups cake flour (not self-rising), sifted
2 teaspoons baking powder
1 teaspoon coarse salt
8 ounces (2 sticks) unsalted butter, softened
1 3/4 cups sugar
1 tablespoon pure vanilla extract
1 cup whole milk
8 large egg whites, room temperature
1 1/2 pints (3 cups) blueberries
34 raspberries (1/2 pint; about 1 1/3 cups)

For the Frosting:
3/4 pound cream cheese, at room temperature
1/2 pound unsalted butter, at room temperature
1 teaspoon pure vanilla extract
1 pound confectioners' sugar, sifted

Directions

For the Cake: Preheat oven to 325 degrees, with racks in middle and lower positions. Line 3 muffin tins with 34 liners. Whisk together 3 cups flour, the baking powder, and salt.
Beat butter, 1 1/2 cups sugar, and the vanilla until pale and fluffy. Scrape down sides of bowl as needed. Beat in flour mixture in 3 additions, alternating with milk.
Beat whites until soft peaks form. Gradually add remaining 1/4 cup sugar, beating until stiff, glossy peaks form. Using a rubber spatula, fold one-third of the whites into batter, then carefully fold in remaining whites. Gently toss blueberries with remaining 1/4 cup flour to coat. Gently fold floured blueberries into batter. Divide batter evenly among cupcake liners.
Bake until cupcakes spring back when touched, 23 to 25 minutes. Let cool in tins on wire racks for 10 minutes. Remove cupcakes from tins, and let cool completely on wire racks.

For the Frosting: Mix the cream cheese, butter and vanilla in the bowl of an electric mixer fitted with the paddle attachment until just combined. Add the sugar and mix until smooth. Frost cupcakes and garnish each with a raspberry.

Helpful Hint
Use a light-colored metal muffin tin for this recipe. Dark and nonstick tins retain too much heat and will cause the cupcakes to burn around the edges before cooking completely in the middle.


[pic and cupcake recipe from marthastewart]

6.30.2009

July 4 Daily D: Simple Sundaes!

Ingredients
Makes 8 sundaes and 60 cookies

FOR THE COOKIES
2 cups sifted all-purpose flour, plus more for surface
1/2 teaspoon baking powder
1/4 teaspoon salt
4 ounces (1 stick) unsalted butter, softened
1 cup sugar
1 large egg
1 teaspoon pure vanilla extract

FOR THE SUNDAES
2 quarts Vanilla Ice Cream, softened
2 quarts Raspberry Sorbet, softened
Blueberries, for garnish

Directions

Make the cookies: Whisk together flour, baking powder, and salt. Cream butter and sugar until pale and fluffy. Mix in egg and vanilla. Gradually add flour mixture, and mix until dough comes together. Shape dough into 2 disks, wrap each in plastic, and refrigerate at least 1 hour (or up to 2 days).
Preheat oven to 325 degrees. Roll out 1 disk of dough to just less than an inch thick on a lightly floured surface. Using a paring knife, cut out spoon shapes, each about 3 inches long. For a spoon template CLICK HERE.
Transfer to baking sheets. Chill in freezer for 15 minutes. Roll out scraps, and repeat once.
Bake until cookies are golden around the edges, about 12 minutes. Transfer sheets to wire racks to cool. Repeat with remaining dough.

Make the sundaes: In 8 small bowls, layer 1/4 cup ice cream, 1/2 cup sorbet, and another 1/4 cup ice cream. Garnish each sundae with blueberries, and serve with 2 or 3 cookie spoons.


Psst! Have you spotted this one somewhere? Probably at the grocery store check-out line! This one comes from Martha Stewart Living! :) Gotta love Martha!

6.22.2009

Dad's Day: Grillin' Filets 101

Filet Mignon…even the name sounds intimidating. Most captains of the grill panic at the shear mention of this great piece of meat. Nightmares of burning, drying and otherwise screwing up this fine cut of beef can make even the most seasoned grill chef break out in splotchies! No need to fear.

Less IS More…

When grilling filet mignon, less is definitely more. Less seasoning, less grilling time, less flipping, less poking and prodding…you get the point. So there is no need to panic, filet mignon is such a prime cut of meat that it is very easy to grill a masterpiece. Before you even touch that steak, let’s look at what you should never, ever do to that poor juicy steak.

NEVER puncture your steak! We will talk about how to tell if it is done later.
NEVER close the lid! With other steaks, yes. With filets, nah!
NEVER cook it too long. There is nothing worst than a $15 piece of beef jerky. We will all cry if this is the end result - yes, this includes your overworked steak knife. Remember, you can always throw it back on for a few...

Grilling Filet Mignon, Step by Step…

Step 1 - Seasoning. You paid a lot for this filet (pay less next time by planning ahead and filling your freezer with these Omaha Steaks Filet Mignons...that's what we did), give it some credit that it is going to hold it’s own in the taste department. The only seasoning I recommend to help this steak out is some fresh ground black pepper. Save the course salt for the end, some say it draws out juices. We want the juicy...so no salty...until afterwards.

Step 2 - Leave it alone! In order to reduce grilling time and ensure consistent cooking throughout the steak, we must bring the filet to room temperature. This is your easiest step, once it’s seasoned just leave it on the kitchen counter. Your patience will be rewarded, trust me…just let it get into the “zone” by itself and move onto these next steps. Let it sit for at least 45 minutes. Go on, leave it alone, move on to the next step!

Step 3 - Fire it up! We are going to use direct heat to grill this delicious steak, so fire up your grill and set it and leave it at the highest temperature setting. You will know she is ready when you can’t hold your hand 2 inches above the grates for more than 5 seconds (don’t try and be tough, you'll singe your arm hairs…ouchie-wouchie).

Step 4 - Sear in those juices! Ok, the moment of truth, your steak has been getting itself ready on the counter and now it’s game time! Using TONGS (oh so delicately) place your steaks on the grill and do NOTHING for at least 2 minutes. The only exception to this rule is if you have to play firefighter and splash a little water on a disturbing flame. A little flare up is fine, but if a flame burns for more than 30 seconds, splash a tiny bit of water on it to put it out.

Step 5 - Grill marks! All we are doing here is creating those cool looking grill marks. After about 2 minutes (for medium-rare, a little more for Medium), lift, turn your steak 90 degrees and then set it back down for another 3 minutes (again, for medium-rare, a little more if you have to have it more done).

Step 6 - Flip once! After a total of about 5 minutes, it’s time to flip that steak for the one and only time. Gently lift, flip and set it back down in the same spot and leave it alone again for about 2 more minutes.

Step 7 - Rotate again. This is getting easy, you know what is next. Repeat Step 5 on this side now!

Step 8 - Check it. Again, don’t poke it, cut it or pierce the flesh in any way. This takes a little practice, but remember that you can always put an underdone steak back on the grill. Test the doneness by pushing on the steak. A rare steak will leave an indention of your finger on the surface. A medium steak will give a little, but not leave an indention. If it feels firm, it’s well done.

Step 9 - Remove and rest. Take it off the grill now, you are done with the heat section! Remove it and set it on a plate or platter and leave it alone.
Your beautiful filet has been through a tramatic experience. It went from refrigerated to room temperature to a HOT grill. This plays havoc on the juices inside so we need to give it some time to collect itself. Now that it is on the platter, let it rest again for 2 - 3 minutes (which will now seem like 2 hours!). This allows the juices to re-distribute, so they don’t all run out when you slice into that beautiful hunk of beef.

Season with salt and booya, you're in business for a fabby steak dinner!

5.24.2009

Memorial Day Menu

This year my rights of freedom are being taken away from me! We have to make up a snow day from earlier in the year - so that means tomorrow is a school day! Bahhh! So bothered. Anyway, we grilled today instead so that I wasn't completely deprived of celebrating with some of the classics. These are yummies that will have the whole fam slash friends wanting to make your house the hot spot for the annual BBQ. So here's the low-down: burgers, lime buttered corn on the cob, ranch potato salad, & homemade strawberry lemonade. Sound good? It was!

Guaranteed Juicy Burgers

Ingredients
2 pounds ground chuck
1 pound ground sirloin
1/2 cup seasoned dry bread crumbs
3 tablespoons steak sauce of choice
4 egg yolks
1 1/2 teaspoons kosher salt
3/4 teaspoon freshly ground black pepper
4 tablespoons cold sliced butter (1 slice per burger)
10 hamburger buns
toppings of choice

Directions

Carefully mix the meats, bread crumbs, steak sauce, eggs, salt, and pepper with the tines of a fork, but do not mash them. Divide the meat into 10 equal-sized balls. Make an indentation with your finger in the middle of each ball. Place the slice of cold butter in the dent. Lightly form hamburger patties and press lightly into shape [sliced butter should be encased by the meat in the center of each patty].

Cook the hamburgers for 4 minutes on 1 side, then turn and cook 3 minutes on the other side for medium. Remove to a plate and cover with aluminum foil. Allow the hamburgers to rest for 5 minutes [don't skip this step as the burgers will continue to cook while resting]. Meanwhile, grill the buns, cut side down with butter, for 1 minute, until toasted.

Lime Butter: Corn on the Cob

Ingredients
3 ears of corn
3 tablespoons of room temp. butter
1 teaspoon lime zest
dash of cayenne pepper
dash of garlic powder
lime wedges (1-2 per plate)
salt & pepper to taste

Directions
Cook ears of corn according to preference (grill, boil, etc). In the meantime combine softened butter, lime zest, cayenne pepper, and garlic powder in a small bowl. Mix until incorporated. Spread on warm corn. Top with salt and pepper. Use lime wedges to squeeze fresh lime juice on top of entire corn.

Mom's Ranch Potato Salad

Ingredients
6 red potatoes (~ 3 cups), washed - keep skins on
1/3 cup chopped green onion
3-4 diced hard boiled eggs
1 cup diced celery
1/4 cup fresh dill
1/4 cup fresh parsley
1 teaspoon dry mustard
Hidden Valley Ranch Dressing (make according to packet)
salt and pepper to taste

Directions

Boil whole potatoes in a large pot until tender with a fork. Drain water and let cool slightly. Cube potatoes and place in a large serving bowl. Pour liberal amount (~1/3 cup) of ranch dressing over warm potatoes. Add celery, eggs, herbs, and green onions. Mix together. Season with dry mustard, salt, and pepper to taste. May add addtional ranch dressing if needed. Refridgerate until completely cooled (~2 hours).

Strawberry Lemonade

Ingredients
2 cups water
1 cup sugar
1 tablespoon lemon zest
1 cup fresh lemon juice
1 pint fresh strawberries, halved
2 cups cold sparkling water or club soda
Ice
Mint sprigs, garnish
Whole strawberries, garnish

Directions
In a medium saucepan, bring the water and sugar to a boil. Reduce the heat and simmer, stirring occasionally, until the sugar dissolves. Add the lemon peel and lemon juice, stir, and remove from the heat. Let cool completely, then strain into a clean pitcher.

In a blender, puree the pint of strawberries and add to the pitcher with the lemon juice. Stir well to combine and refrigerate until well chilled.

Add the sparkling water and stir well. Pour over glasses filled with ice and serve, garnished with mint and strawberries.

3.30.2009

Fool your Family

April Fool's Day is quickly approaching. I collected a few tricks to be played on your families this year during meal times. They're quick and simple. Most of us have these basic things lying around the house somewhere. Go on a treasure hunt in closets and cupboards to find all of the materials and ingredients you'll need to pull of these great pranks! Enjoy!

Have a great reaction using any or all of these menacing meals? Be sure to leave us a comment and share your hysterical story!

Gigantic Pancakes

This is such a simple prank to pull! It's a guaranteed to make your little ones' eyes bulge! Want to make it an all-out experience? Be sure to read, Cloudy with a Chance of Meatballs by Judi Barrett. There's a page out of the book where it rains giant pancakes.

Ingredients:
1 packet quick-acting dry yeast
1 box instant pancake mix

Directions:
Mix quick-acting dry yeast into the prepared pancake mix. Cook according to box directions. Be prepared to witness the biggest pancakes you've ever seen. It's sure to be a BIG hit! Don't forget to tell them, "April Fool's."

or make 'em from scratch...

Simple Pancake Recipe:
1 egg
1 cup all-purpose flour
3/4 cup milk
1 tablespoon sugar
2 tablespoons vegetable oil
1 tablespoon baking powder
1/2 teaspoon salt
* (secret ingredient) quick-acting dry yeast!

Directions
In a bowl, mix all the ingredients together, breaking up any lumps. Pour batter onto a hot griddle. Flip pancakes when the edges appear cooked and the batter bubbles on top. Serve immediately.


P.S. Just because this is fun doesn't mean they can't be delicious as well. Try adding toppings such as sliced bananas, walnuts, powdered sugar, & maple syrup! Chocolate chips, strawberries, drizzled with chocolate sauce and whipped cream wouldn't be bad either? Play around...have fun.

Frozen Cold Cereal

Most mornings call for a quick and simple bowl of cold cereal. But for April Fool's Day it can't be just any ordinary cold cereal. Make it REALLY cold...say, frozen?

Instructions:
The night before April Fool's, pour cereal into a bowl. Add milk 2/3 of the way full. Put in the freezer overnight. In the morning, add a layer of milk on top. Call your family to breakfast and see their reactions in trying to eat "frozen" cold cereal! Gotcha! I promise it'll be an April Fool's Day to remember!


[pic from www.ppsrx.com]

Magic Carrots

Do you have a garden that you've just planted? If so, or even if not, these magic carrots will be sure to surprise your families!

Instructions:

Buy carrots with tops at the grocery store. Go home and plant them in your garden or in the ground. The next day, April Fool's Day, take your family outside to see the magic carrots. Explain you don't know how they just seemed to grow overnight? They must be magic! Pull them out and steam them for dinner. They'll go great alongside your "Faked Potatoes"! Hahaha!

[pic from www.maycottage-lops.co.uk]

Faked Potato

These dud spuds make a great side dish at dinnertime on April Fools' day. After the joke's been sprung, kids can serve up the pretend potatoes at playtime.

Craft Materials:
Nude-colored nylons
Pillow batting
Needle
Thread
Scissors
Yellow craft foam or yellow construction paper
Time needed: Under 1 Hour

Instructions:
1. For each potato, stuff an 8-inch section of nude-colored nylons with pillow batting (A).

2. Twist both ends and use a needle and thread to sew them to the bottom (B).

3. For each eye, push the threaded needle up from the bottom and out the top of the potato, then back through about 1/8 inch from where it came out (C). Pull the needle out the bottom and knot the thread to secure it. Before "serving," use scissors to cut a slit in the top and add a pat of craft foam/paper butter.


[pic & content from familyfun.com]
Related Posts Plugin for WordPress, Blogger...